I am a National level weight lifter and injured during practice in the year 2018. Doctors told me about operation and I take medicine 18 days but after some relief it again paining. My friend told me about Yoga peace. I go there and surprised that only 10 to 12 days I got result. Now I don’t take medicine and again preparing for next competition. I am very thankful to Guruji Dhakaram Ji who give me right direction.
Now after 9 years there is no pain and I am fully fit after treatment given by Yoga peace I am participated in World Master Weightlifting Championship held at Barcelona Spain and clinch Gold Medal 🏅 and after it many medals clinch in not only in All India Postal Weightlifting Tournament and also in All India Civil Services Weightlifting Tournament. After it I am recommended Yoga peace and many person got right treatment for their problems like frozen Shoulder, Slip disc etc.
I am very thankful to Yogapeace and Guru ji Dhaka Ram Ji 🙏🏻🙏🏻
मैं हृदय से योगाचार्य ढाकाराम गुरुजी और उनके योगापीस सेंटर का बहुत-बहुत धन्यवाद करना चाहती हूँ।
कुछ समय पहले तक मुझे कंधे, कमर और पैर में बहुत दर्द व सुनापन रहता था और दाहिने पैर में ब्लॉकेज बताया था वह L4-L5 की कंप्रेशन के कारण है ऐसा डॉक्टर ने बताया था, साथ ही हर समय थकान महसूस होती थी। मैंने कई अच्छे फिजिशियन्स और अनुभवी डॉक्टर्स से सलाह ली, उनकी दवाइयाँ भी लीं और कई तरह के डायग्नॉसिस व टेस्ट भी करवाए, लेकिन उससे मुझे कोई खास फायदा नहीं मिला।
लेकिन जब से मैंने योगाचार्य ढाकाराम गुरुजी के मार्गदर्शन में थैरेपीयूटिक योग शुरू किया है, मेरी सेहत में अद्भुत सुधार आया है। आज मैं पहले से कहीं अधिक स्वस्थ, ऊर्जावान और सकारात्मक जीवन जी पा रही हूँ और मेरे पैरों का सुन्नपन 100% सही हो गया और कंधे में 60% आराम है।
आपकी मेहनत, सही मार्गदर्शन और समर्पण ने मेरी जिंदगी में बहुत बड़ा बदलाव लाया है। आपका दिल से आभार। 🙏
ईश्वर आपको हमेशा स्वस्थ और खुश रखे, ताकि आप इसी तरह लोगों के जीवन में स्वास्थ्य और खुशियाँ लाते रहें।
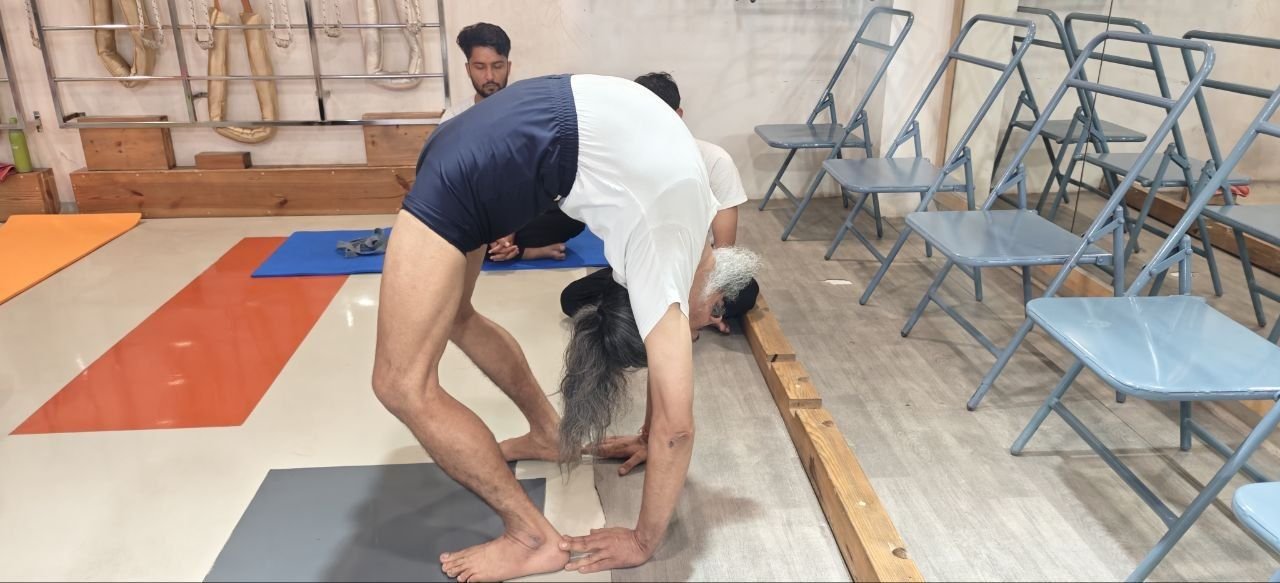
Chakrasana is a very important yoga posture in which the body is bent backward to form the shape of a wheel. That is why it is called Chakrasana, and in English, it is known as the Wheel Pose.
Chakrasan holds a special significance in traditional yoga texts. It is also known as Urdhva Dhanurasan, and this name is widely used in the yoga tradition of Guruji B. K. S. Iyengar. The classical Hatha Yoga text Hatha Ratnavali, believed to be authored by Srinivasa Yogi, also mentions Chakrasan. In this text, it is considered one of the 84 important asanas described by Lord Shiv, and is regarded as a significant posture for enhancing flexibility and strength in the body.
Importance of Chakrasana
Chakrasana is not just a physical posture; it is a powerful asana that energizes the entire body. It improves spinal flexibility, opens up the chest, and revitalizes both body and mind. With regular practice, one feels more active, energetic, and confident.
How to Do Chakrasana (Step-by-Step)
Practice this asana on a yoga mat, mat, or blanket for safety and comfort.
Lie down on your back in Shavasana.
Bend both knees and bring your heels close to your hips.
Keep a shoulder-width distance between your feet.
Slowly raise your hands and place them above your head.
Bend your elbows and place your palms on the floor beside your shoulders.
Inhale deeply and press into your palms and feet.
Gradually lift your shoulders, chest, and then your lower back upward.
Lift your body as much as your capacity allows.
Try to straighten your arms and legs while expanding your chest fully.
Hold this position for 15–20 seconds, keeping your breath normal.
With practice, you can increase the duration to 1–2 minutes.
To come out, slowly lower your body in reverse order.
First bring your head and shoulders down, then your back and hips.
Relax your hands beside your body and straighten your legs.
Rest in Shavasana and observe your body and breath for at least 1 minute.
Benefits of Chakrasana
Regular practice of Chakrasana offers multiple benefits:
Improves flexibility and strength of the spine
Makes the body active and energetic
Strengthens shoulders and wrists
Tones the shoulder blades and back muscles
Highly beneficial for heart and lungs
Expands the chest and improves breathing
Boosts overall vitality and positivity
Precautions
Chakrasana should be practiced carefully. Avoid this posture in the following conditions:
Back pain or spinal issues
During pregnancy
During the menstrual cycle
Frozen shoulder
Any serious injury in shoulders, neck, or back
If you feel discomfort at any stage, stop immediately.
Important Note
While practicing Chakrasana or any backward-bending posture, ensure that the bend comes from expanding the chest—not from compressing the lower back. The focus should be on opening the chest as much as possible to avoid unnecessary pressure on the lower back, which can otherwise be harmful.
Chakrasana is a highly effective yoga posture that activates the body, breath, and mind. When practiced correctly with awareness and consistency, it enhances flexibility, strength, and inner energy. It helps bring balance, joy, and overall well-being into life.
Hari Om, and a smiling greetings to all of you! A heartfelt welcome to the “Anandam- One Step Towards Health to Happiness” program. In this series of happiness, today we will discuss a very special topic—’Yoga for Beauty’.
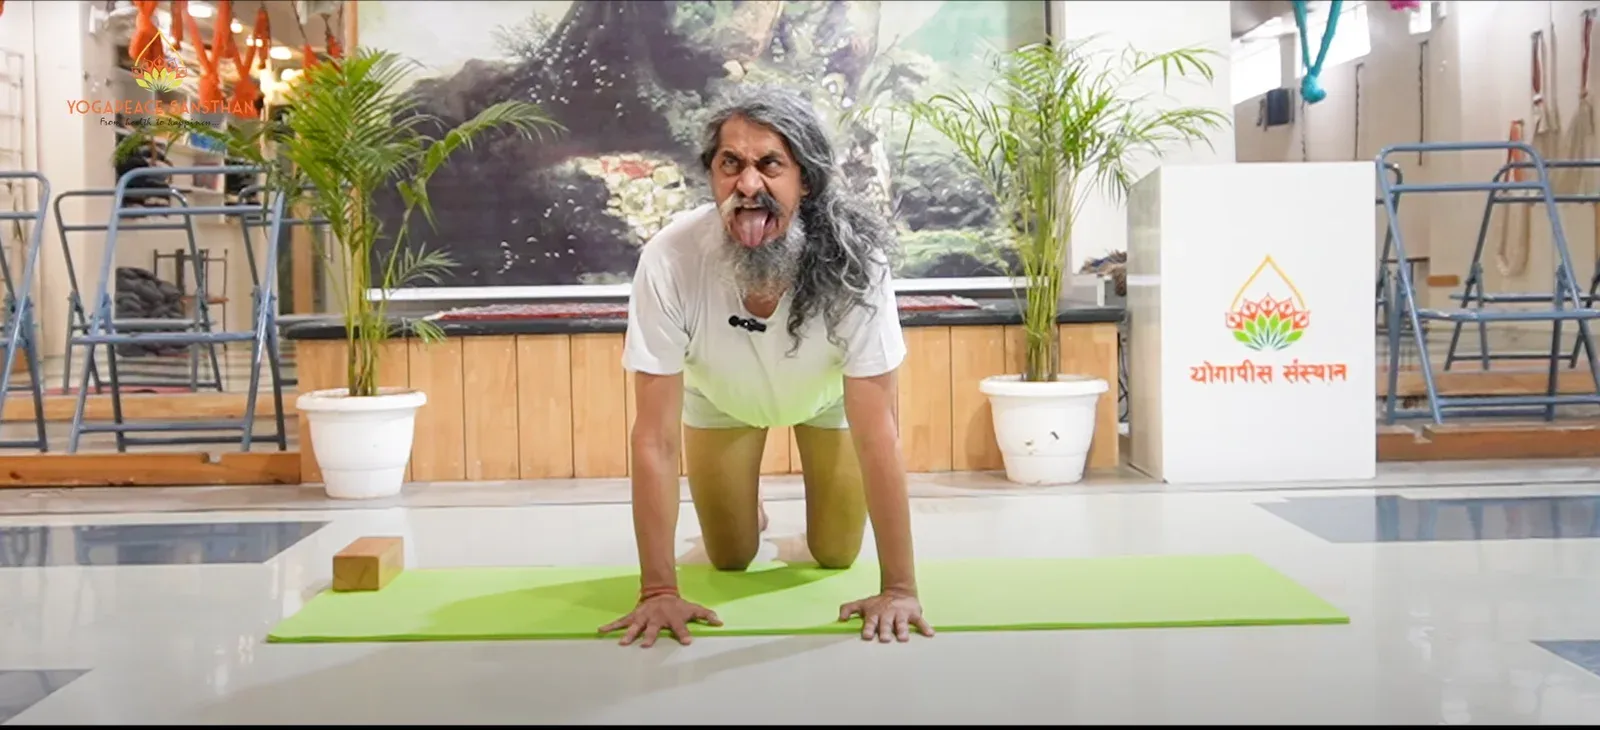
I believe that yoga and beauty are complementary to one another. When you are joyful from within through the practice of yoga, that natural glow automatically reflects on your face. Today, we will discuss a posture that will significantly enhance your facial radiance—Simhasana (the Lion Pose).
Natural Beauty vs. Artificial Treatments
People often turn to beauty parlors for glowing skin, but if you practice Simhasana regularly, you will not need them. Let’s understand why Simhasana is far superior to artificial beauty treatments:
While beauty parlor treatments are expensive, Simhasana is completely free and provides lifelong benefits.
Artificial treatments work only on the surface of the skin, whereas Simhasana activates the muscles from within and increases blood circulation.
Parlor treatments are limited to the skin, while Simhasana also strengthens the thyroid, lungs, and heart.
The effects of chemical treatments fade in a few days, but the results of yoga are permanent and long-term.
There is always a risk of allergies from the chemicals in beauty products, but Simhasana is entirely natural and safe.
Simhasana: A Treasure Trove of Health
Simhasana is not just about beauty; it is a treasure trove of health benefits:
Glandular Health: it is a panacea for the glands in the throat, such as the thyroid and parathyroid.
Lungs and Heart: While roaring, when we exhale completely, the lungs are emptied. Upon receiving fresh oxygen again, the heart gains new strength.
Facial Glow: It exercises and tones all the facial muscles (cheeks, eyes, chin).
Speech Purification: It is very beneficial for people with stuttering or voice-related issues.
Simple Method to Practice Simhasana
You can perform this according to your capacity while sitting on the floor, a chair, or even on a bed:
First, come onto your hands and knees, positioning yourself like a standing lion.
Take a deep breath and lean your body slightly backward.
Stick your tongue out fully. While exhaling, bring your body forward, expand your chest, open your mouth wide, and stretch your tongue out toward your chin.
Focus your eyes on the center of your eyebrows (Bhrumadhya), where a tilak is traditionally applied.
Produce a roaring sound like a lion from your throat until your breath is completely exhaled. Afterward, slowly take your tongue back in and relax.
Sit down slowly and close your eyes.
The most important part after the posture is ‘Observation’. Sit quietly and feel the sensations occurring in your face and throat. This is a form of subtle meditation. Practice this for 3 to 5 minutes daily.
I request you all to experience this for yourselves and enhance your natural beauty. If you find this information helpful, please share it with others so that everyone can benefit from yoga.
May you all remain happy and healthy, and may the grace of the God be upon you.
Dear Friends, Warm greetings and a smiling welcome to you all in our series “A Step Towards Health and Happiness.”
How are you all doing? I’m sure you are feeling great — especially if you practice Yoga regularly. Daily yoga fills our body and mind with positive energy.
Today, let’s talk about an ancient Ayurvedic practice known as “Usha Paan.”
What is Usha Paan?
The word “Usha” means early morning — the time just before or during sunrise. Drinking water at this sacred hour, right after waking up, is called Usha Paan.
In Ayurveda, Usha Paan is considered as “Amrit Paan” — the drink of immortality — because it helps prevent numerous ailments. According to Ayurveda, most of our health problems originate from the stomach. By practicing Usha Paan daily, one can stay protected from many digestive disorders.
How to Practice Usha Paan
Upon waking up on an empty stomach, drink about 1 to 1¼ liters of water — without rinsing your mouth.
The water should be gulped down continuously, not sipped slowly.
If this feels difficult initially, start with as much as you can drink and gradually increase the quantity.
Why Should You Drink Without Rinsing Your Mouth?
During the night, our mouth naturally collects saliva, which is beneficial for digestion. That’s why Ayurveda recommends drinking water before brushing or rinsing your mouth.
You might wonder — “But isn’t my mouth dirty in the morning?” The simple solution is: after dinner at night, brush or clean your mouth before sleeping, so it remains fresh and clean by morning.
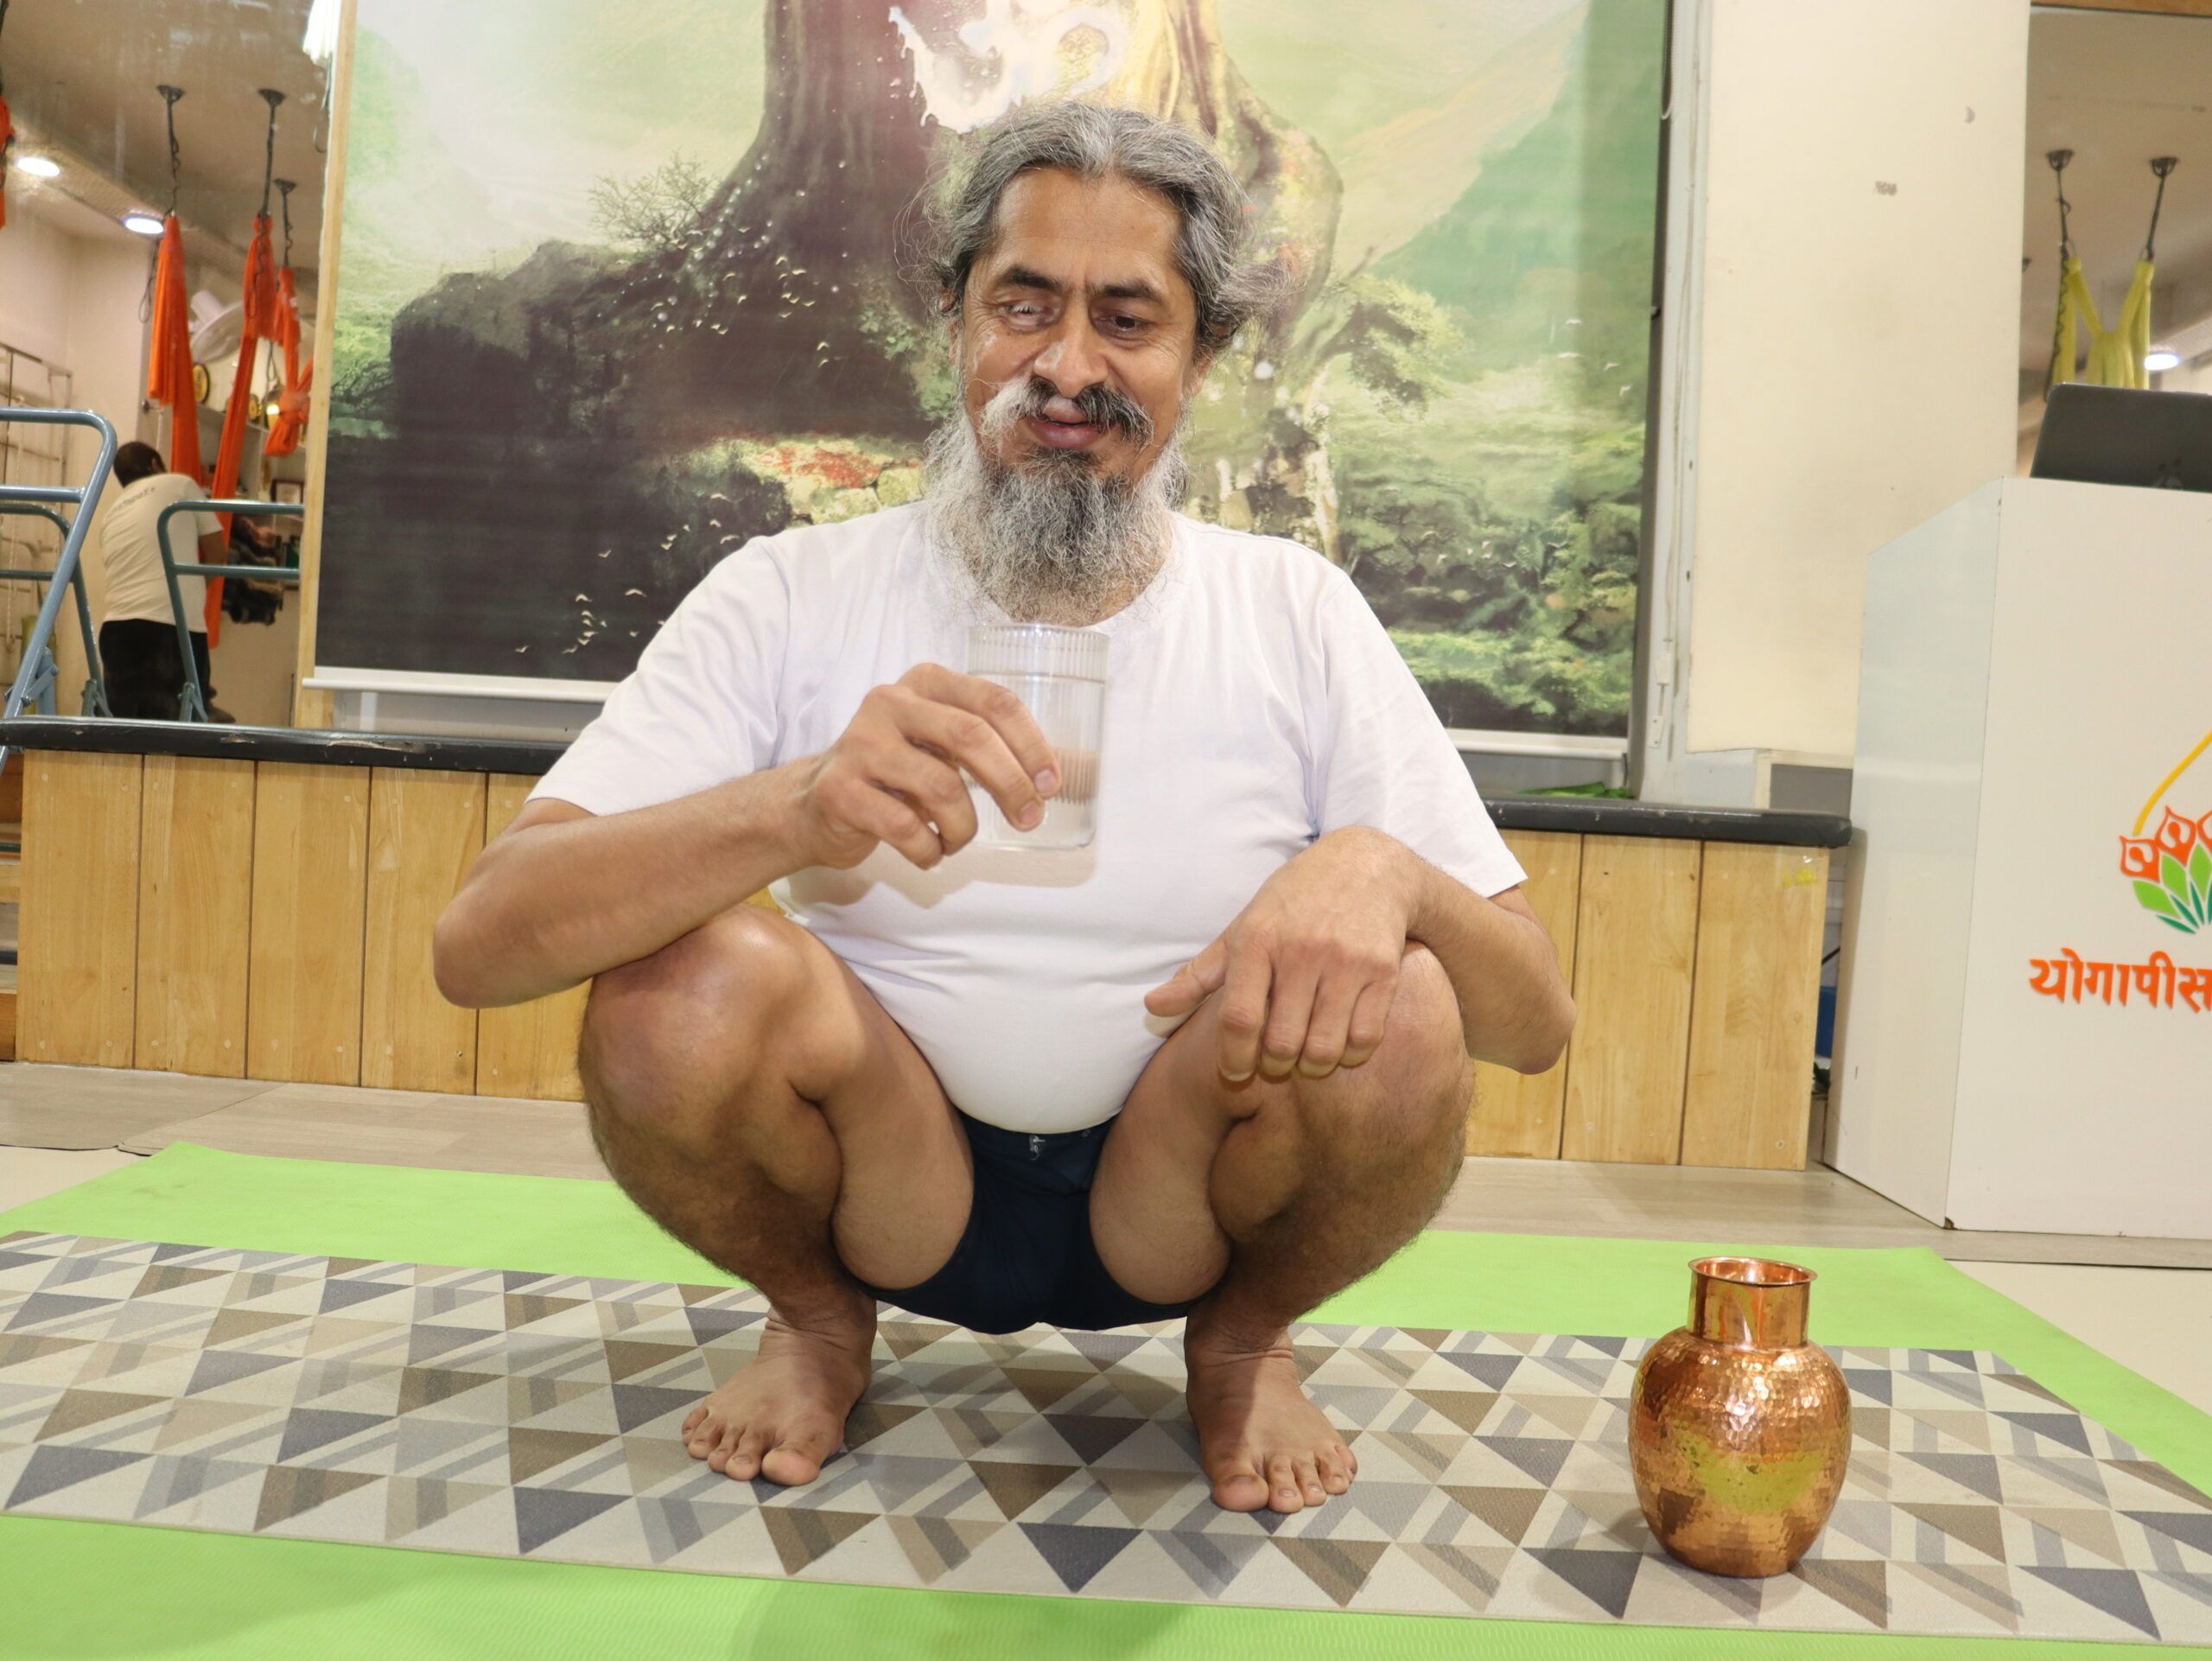
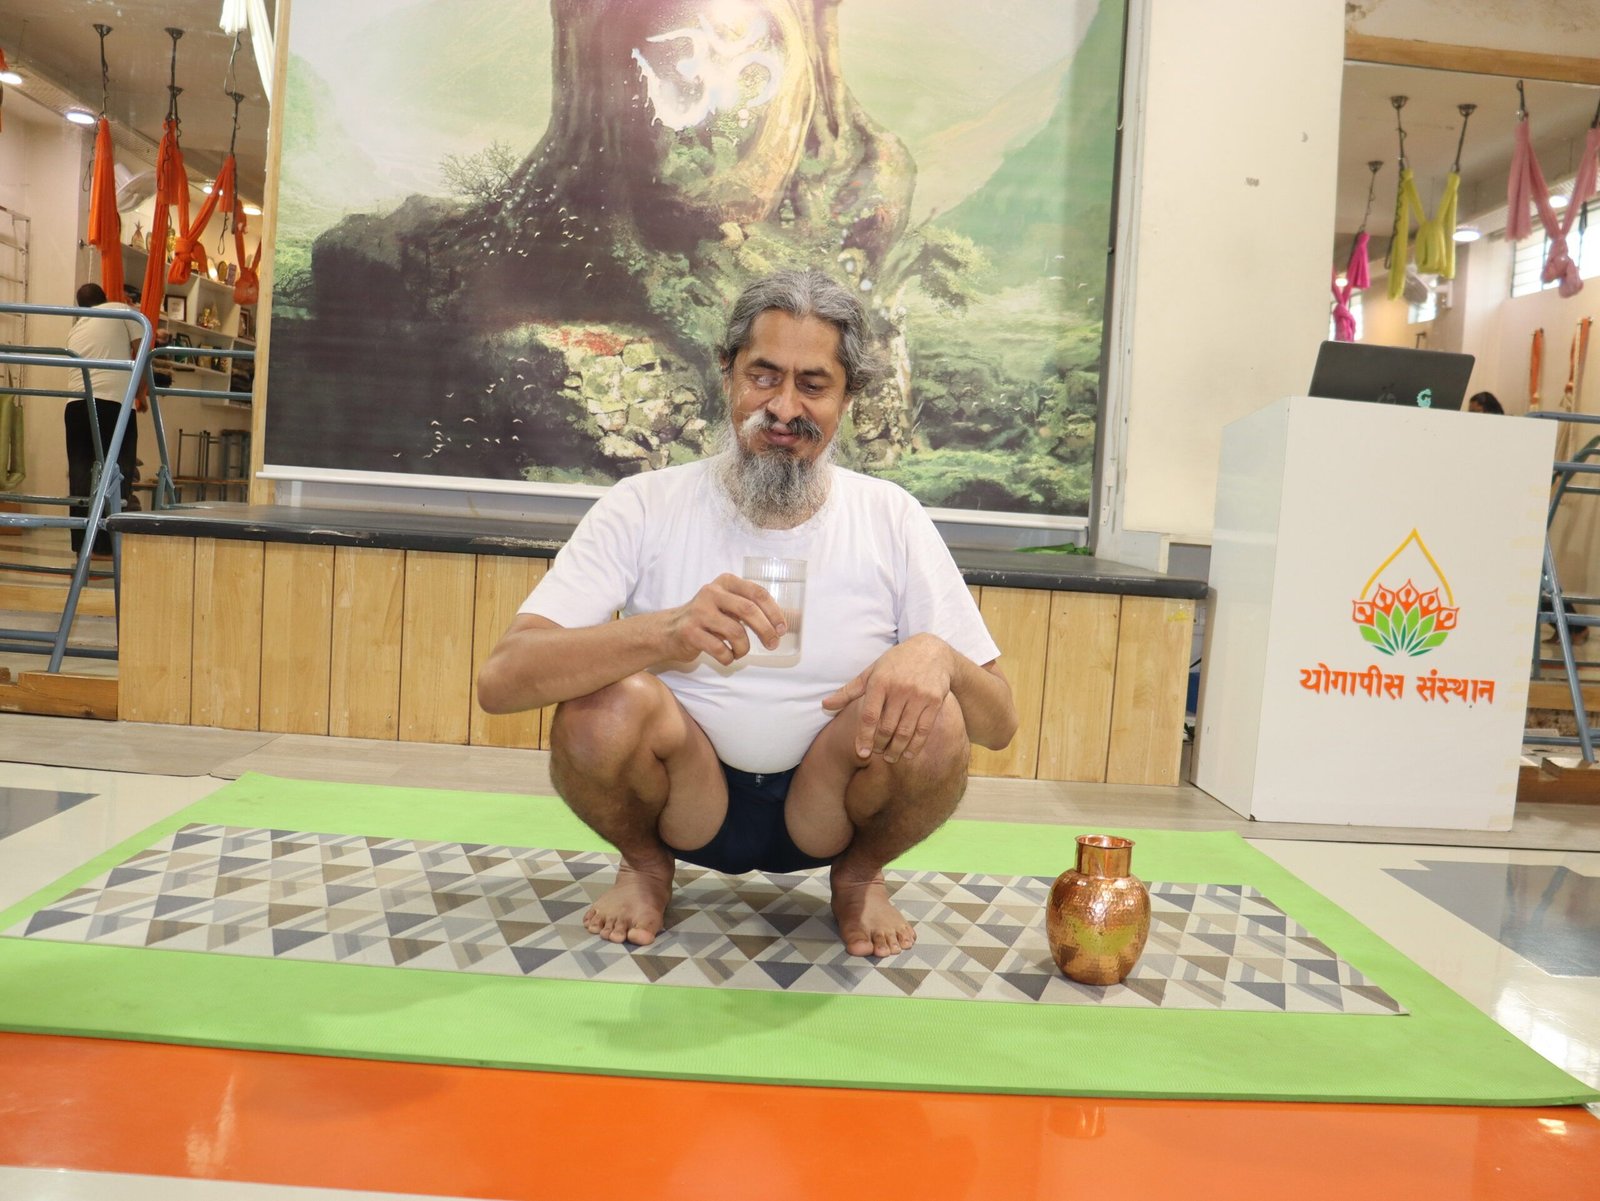
The Right Posture for Usha Paan
Sit in a squatting position (like the Indian ukaddu posture) while drinking water. This helps strengthen the digestive system and intestines. It’s also beneficial for your knees.
If squatting is uncomfortable, you may drink water while sitting on a chair or sofa.
Benefits of Usha Paan
Keeps the digestive system strong and active.
Helps relieve constipation and excess acidity.
Prevents indigestion and supports regular bowel movement.
Aids in healing all kinds of stomach-related disorders.
Precautions
If drinking too much water at once feels difficult, start with a smaller amount.
Gradually increase the quantity day by day as your body adjusts.
A warm and cheerful welcome to everyone! We greet you all with a smile and welcome you to our program “Ek Kadam Swasthya Se Anand Ki Ore” (A Step from Health to Happiness).
Today’s topic is Chandrabhedi Pranayama.
This pranayama is especially beneficial for issues caused by excessive heat — such as mouth ulcers, stomach ulcers, excessive sweating, and body heat.
What is Chandrabhedi Pranayama?
The word “Chandrabhedi” literally means “that which provides coolness like the moon.”
Our body has two nostrils:
The right nostril represents the Surya Nadi (Sun Channel)
The left nostril represents the Chandra Nadi (Moon Channel)
When we inhale through the left nostril and exhale through the right nostril, it is called Chandrabhedi Pranayama.
This pranayama should be practiced mainly in the summer season. It helps protect the body from all heat-related ailments. You can perform it three times a day — morning, noon, and evening.
How to Practice Chandrabhedi Pranayama
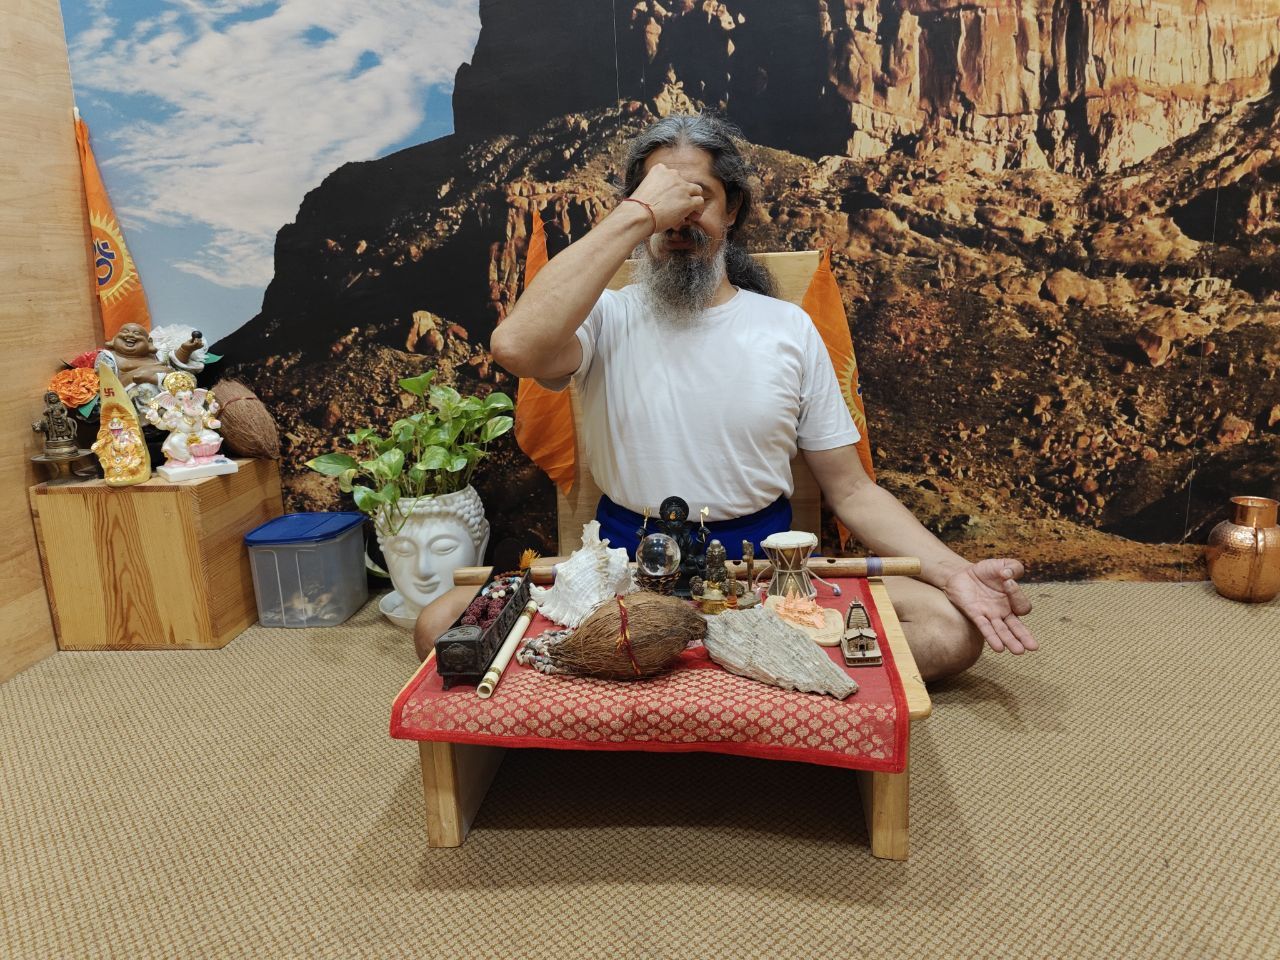
Sit comfortably in any meditative posture (such as Sukhasana or Padmasana).
Keep your spine, neck, and head straight and aligned.
Make sure there is no tension in the face or abdominal muscles.
Form the Pranayama Mudra with your right hand:
Place your index and middle fingers near the base of your thumb.
Close the right nostril with your thumb, and place your ring and little finger on the left nostril.
This hand position is also known as the Nasika Mudra.
Close the right nostril and inhale slowly through the left nostril.
Then exhale slowly through the right nostril.
Repeat this breathing pattern several times.
Once finished, close your eyes and observe the effects within your body.
Note: The true benefit of any pranayama comes only through awareness and observation. Just as we empty a bottle before refilling it with fresh water, we must exhale old breath completely before taking in new pranic energy.
Precautions
Do not make any sound through the nose while inhaling.
Always inhale through one nostril and exhale through the other.
Keep your spine and neck straight.
The right arm should be raised parallel to the shoulder.
The nose should be aligned with the navel.
End the practice by inhaling through the left nostril.
Practice only during summer season, not in winter.
Benefits
Extremely beneficial for those with high blood pressure.
Brings coolness and calmness to the entire nervous system.
Helps relieve mouth ulcers, stomach ulcers, excessive sweating, heat strokes, nose bleeding (epistaxis), and burning sensation in the stomach.
Thank you very much for reading our article with attention and enthusiasm.
Dear friends, a warm and smiling namaste to all of you! Welcome once again to our series “A Step from Health to Happiness.”
How are you all doing? I truly believe that if you practice yoga regularly, you are doing wonderfully well — because daily yoga fills our body and mind with positive energy.
What is Usha Paan?
In our previous article, we discussed the concept of Usha Paan — the practice of drinking water early in the morning on an empty stomach. Today, let’s understand how to perform Usha Paan correctly and what type of water is best suited for it.
During Summer
In the summer season, earthen pot water is the best for Usha Paan. Our body is made up of five elements — earth, water, fire, air, and space.
The earthen pot is made from the earth element, baked in fire, and when we store water in it, all five elements harmoniously blend within that water. Hence, water stored in a clay pot becomes naturally balanced and energizing for our body.
During Winter
In winter, it is best to drink water kept overnight in a copper vessel. Fill the copper pot with water at night and drink it first thing in the morning.
To enhance its benefits:
Place the copper vessel on a wooden platform (it acts as an insulator between the earth and the vessel).
Cover it with a mesh lid and keep it in the open so that moonlight can fall upon it.
Copper has a natural purifying property, which makes the water clean and health-enhancing.
If Copper Vessel is Not Available
If you don’t have a copper vessel, you can use a glass container instead — but never use plastic bottles.
You can even try this simple experiment: Fill one plastic bottle and one glass bottle with water and keep them overnight. Next morning, you will notice that the plastic bottle emits a foul odor, while the glass one remains fresh.
Should You Drink Warm Water?
Some people recommend drinking lukewarm water for Usha Paan. However, in my opinion, normal temperature water is best.
When we regularly drink warm water, our body becomes dependent on it — and warm water is not always available everywhere.
Only when you suffer from cold, cough, or flu, you may take lukewarm water for temporary relief.
Benefits of Usha Paan
Practicing Usha Paan daily keeps your digestive system strong and active. It helps in eliminating constipation, acidity, and indigestion, and brings relief from almost all types of stomach-related disorders.
Precautions
If you cannot drink much water in the beginning, start with a small quantity and gradually increase the amount every day.
In Conclusion
Stay happy, joyful, and blissful always. Let’s take one more step — from health to happiness.
Dear friends, a warm and cheerful greeting to you all! Welcome once again to our program “Ek Kadam Swaasthya Se Anand Ki Ore” — One Step from Health to Happiness. How are you all? I believe you’re doing great — especially if you practice yoga every day. Daily yoga fills our body and mind with positive energy and inner balance.
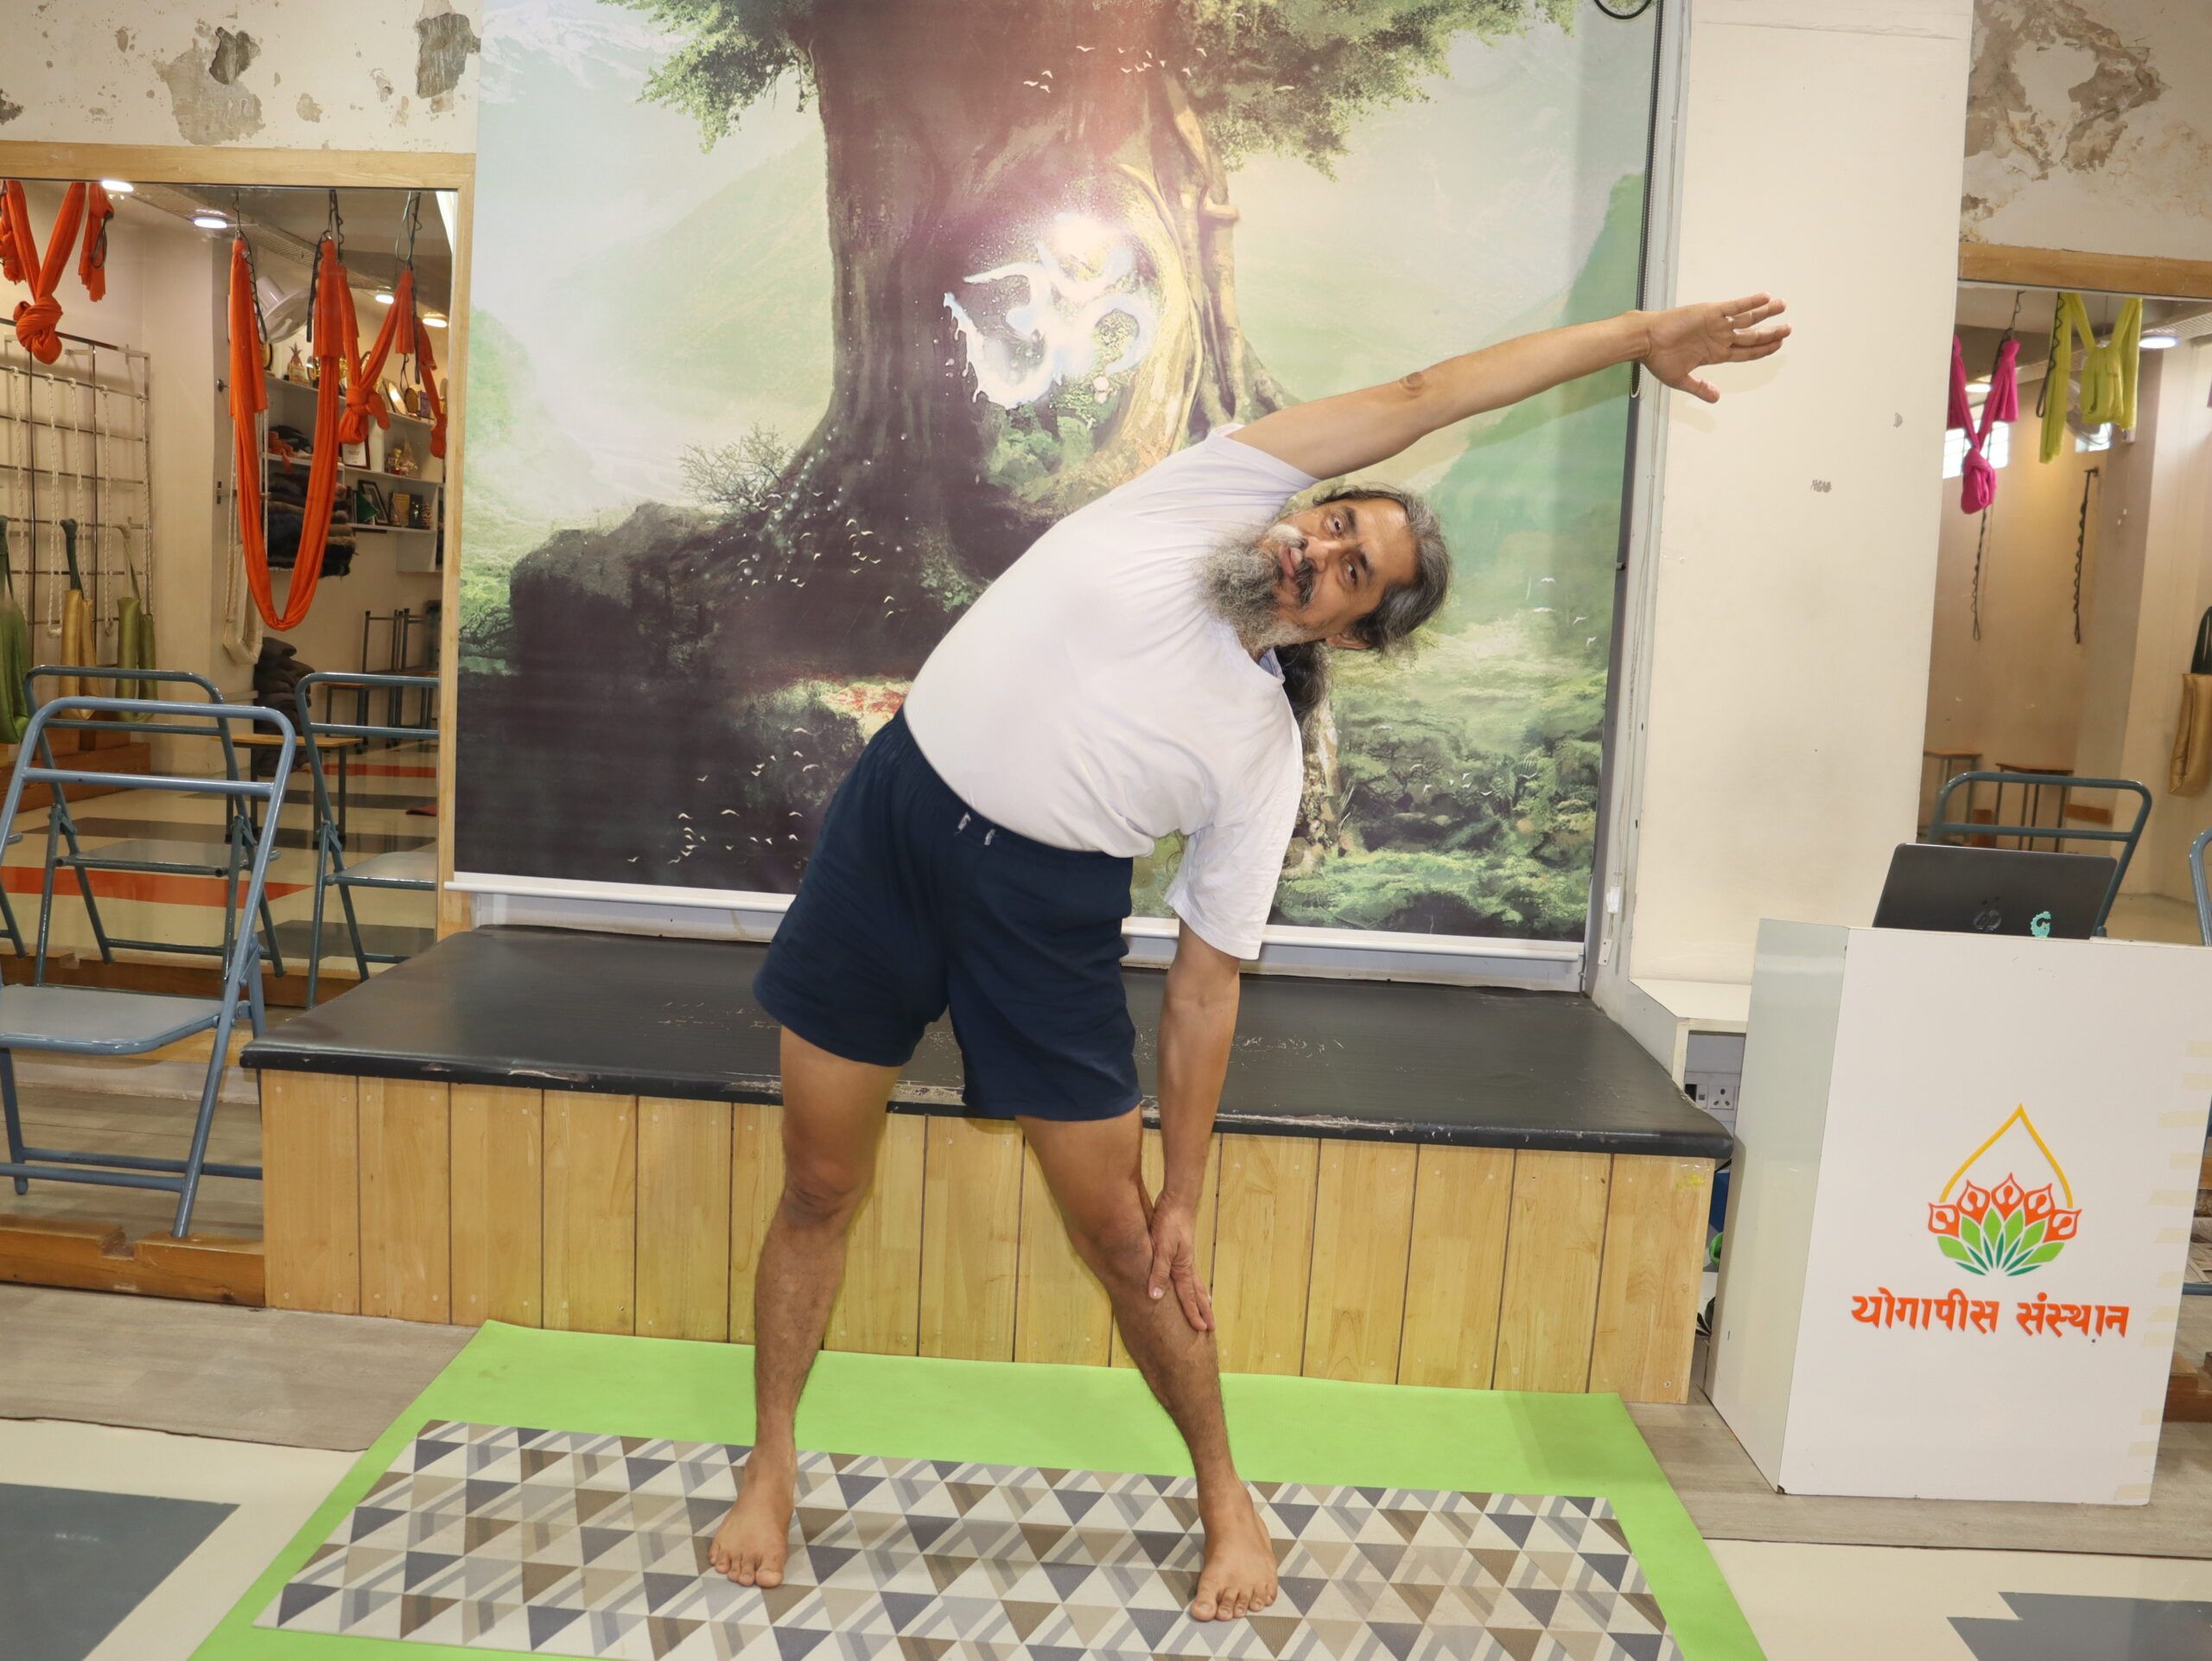
Today, let’s learn about KONASANA — a simple yet powerful yoga posture that helps in keeping our spine flexible and body energetic.
How to Practice Konasana
Stand straight in Samasthiti (normal standing position).
Keep about 2 to 2.5 feet distance between both feet.
Let both arms rest alongside your thighs.
Slowly raise your right arm from the side upward, turning your palm towards the sky.
Stretch the arm straight above your head.
Now bend your upper body to the left, and try to touch your left foot or toes with the fingers of your left hand.
Keep your right arm stretched beside your ear, near your temple.
Stay in this position for at least one minute.
Gently return to the starting position (Samasthiti).
Close your eyes and observe the changes in your body and breath.
Now repeat the same steps on the other side (to the right):
Maintain a distance of about 2 to 2.5 feet between your feet.
Lift your left arm upward with your palm facing the sky.
Stretch it straight above your head.
Slowly bend your body to the right, and try to touch your right foot or toes with the fingers of your right hand.
Keep the left arm straight beside your ear.
Remain in this posture for one minute.
Return gently to the original position.
Close your eyes, relax, and feel the effects of the posture.
Benefits of Konasana
Strengthens the shoulders.
Improves flexibility of the rib cage.
Enhances lung capacity and breathing efficiency.
Keeps the heart healthy and active.
Increases flexibility of the spine (merudand).
Reduces fat from the sides of the waist.
Precautions While Practicing
Only the upper body should bend — not the lower.
Keep elbows and knees straight throughout the pose.
Ensure both feet are facing forward.
When bending to one side, do not lean forward or backward — move only sideways.
The bend should be from the armpit, not the waist.
Avoid straining the neck; keep it in a natural, relaxed position.
Maintain equal weight on both feet.
Slightly contract your hips (buttocks) for better stability.
May you all remain happy, joyful, and full of energy!
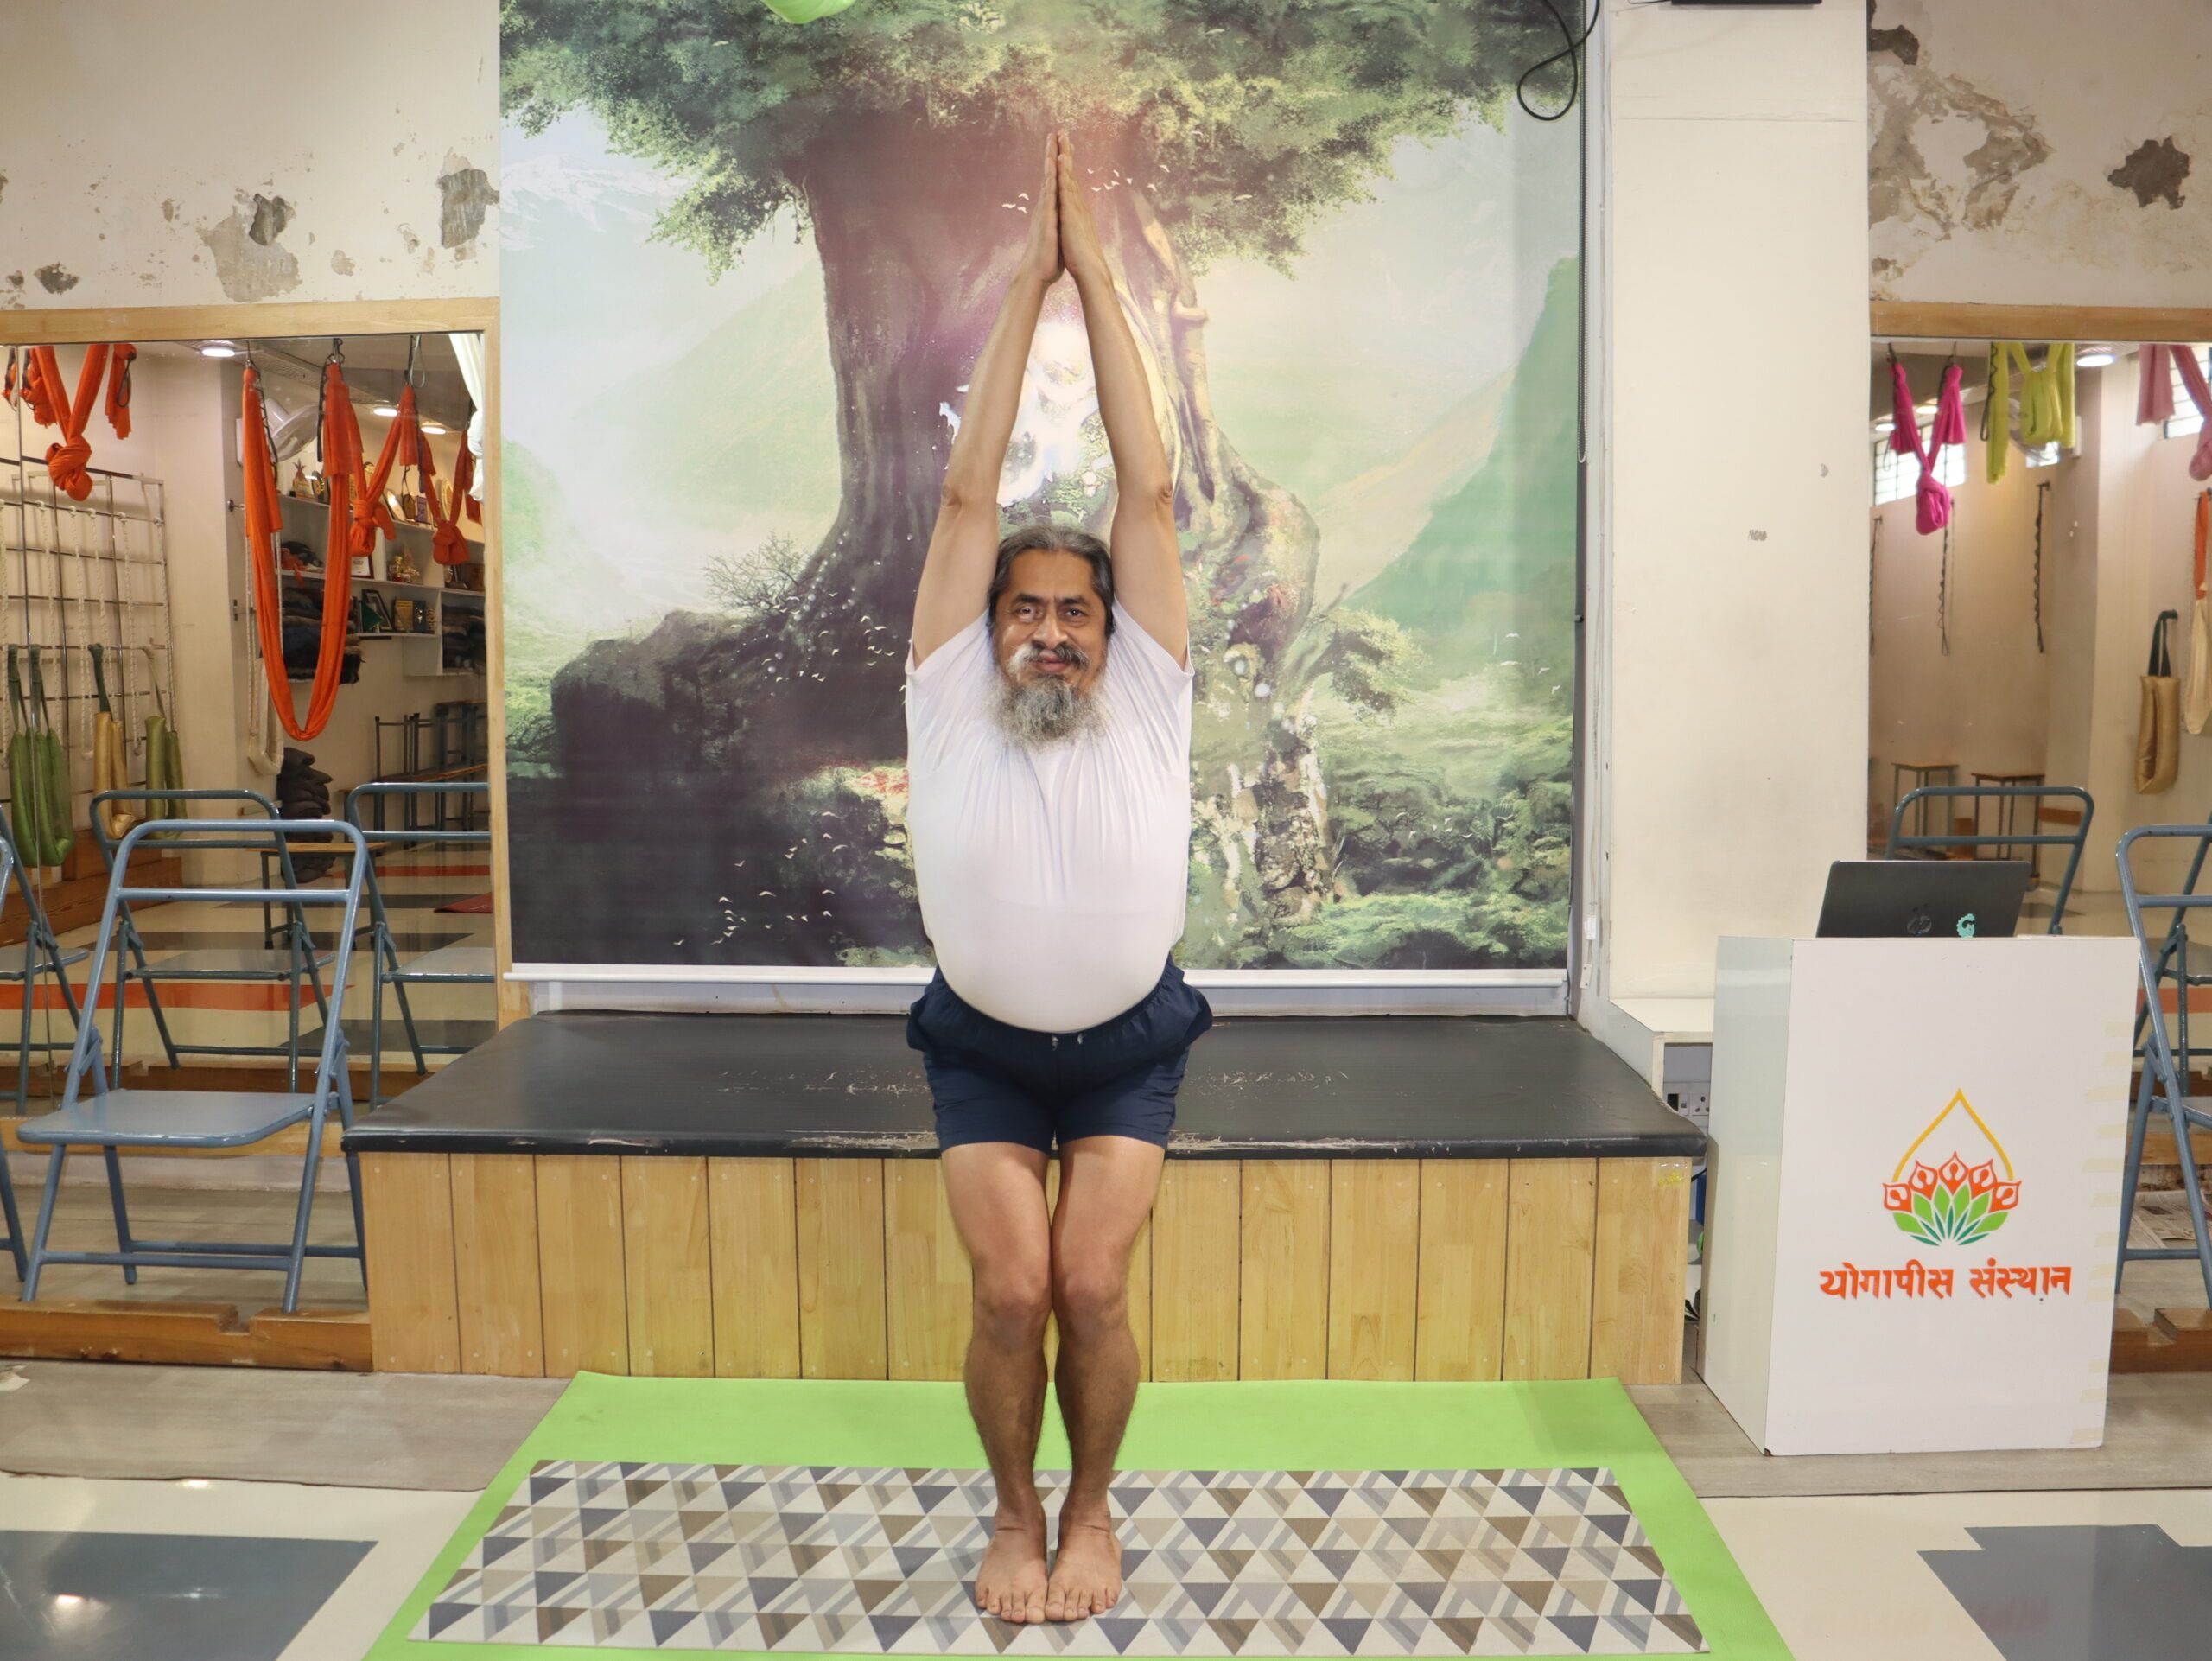
Dear friends, A warm and cheerful namaste to all of you! Welcome once again to our program “Ek Kadam Swaasthya Se Anand Ki Ore” (A Step from Health to Happiness). Today, let’s learn about Utkatasana — the powerful and energizing yoga posture.
Meaning of Utkatasana
The word “Utkat” in Sanskrit means powerful, intense, or fierce. In this posture, you sit as if on an imaginary chair, which is why it’s also known as the Chair Pose.
Steps to Practice Utkatasana
Stand straight in Samasthiti (normal standing position).
Raise both arms up to shoulder level, palms facing the sky.
Stretch your arms upward and bring your shoulders close to your ears.
Slowly bend your knees and move down as if sitting on an imaginary chair.
Keep your chest expanded and spine straight.
Join your palms together, keeping heels, toes, and knees close to each other.
Hold the position for at least one minute, breathing normally.
Slowly return to the starting position and relax.
Close your eyes and observe the sensations in your body before and after the pose.
Benefits
Strengthens calves, knees, thighs, waist, and shoulders.
Improves body balance and endurance.
Makes the spine strong and flexible.
Enhances digestion and blood circulation.
Increases focus, confidence, and mental steadiness.
Precautions
Keep your heels and toes together.
Knees should not cross the line of your toes.
Keep your arms and body straight and extended.
Arms should stay close to the ears.
Palms should remain joined, but thumbs should not interlock.
Stay joyful, cheerful, and happy always! Thank you very much.
Importance of the Vessel for Healthy Morning Hydration
Usha Paan is not just about drinking water in the morning; it is a simple yogic practice to align the body with nature. The right vessel and the right type of water significantly enhance its benefits.
Best Water for Healthy Morning Hydration in Summer
During the summer season, earthen pot (clay pot) water is considered the best for Usha Paan.
Our body is composed of five elements — Earth, Water, Fire, Air, and Space. An earthen pot is made from soil (earth element) and is baked using fire (fire element). When water is stored in an earthen pot, all five elements naturally come together. Therefore, matka water is extremely beneficial, cooling, and supportive for the digestive system.
Suitable Vessel for Usha Paan in Winter
In winter, water stored in a copper vessel is the most suitable for Usha Paan.
Fill a copper vessel with water at night and drink the same water after waking up in the morning. For enhanced benefits, keep the following points in mind:
Place the copper vessel on a wooden platform, which works as an insulator between the earth and the vessel.
Keep it open with a mesh cover so that moonlight can fall on it.
Copper naturally has the ability to purify water and make it more energetic.
If a Copper Vessel Is Not Available
If a copper vessel is not available, you may use a glass container. However, plastic bottles should never be used.
You can try a simple experiment— Fill one glass bottle and one plastic bottle with water at night. In the morning, you will notice that water in the plastic bottle develops an unpleasant smell, while water in the glass bottle remains fresh.
Use of Lukewarm Water — A Balanced View
Some people believe that Usha Paan should always be done with lukewarm water. In my opinion, normal room-temperature water is the best.
Habitual use of lukewarm water makes the body dependent on it, and lukewarm water is not always available in every situation.
However, in cases of cold, cough, or flu, lukewarm water may certainly be used.
Benefits of Usha Paan
Regular practice of Usha Paan:
Keeps the digestive system healthy
Helps relieve constipation, excess acidity, and indigestion
Is beneficial in almost all stomach-related disorders
Usha Paan is a simple, natural, and highly effective health practice.
Precautions
If you are unable to drink a large quantity of water at once, start with a small amount and gradually increase it. Always respect your body’s comfort and capacity.
May you all stay happy, stay joyful, and live blissfully.